
Building and Decorating a Chicken Butter Dish Lid
This is an abbreviated illustration of a lengthy process. Here I show images of the chicken lid (only) under construction. The dome is built with two stacked slab strips. It is closed at the top with one curved piece and then pushed from the inside to inflate more.


The Head is made from a pinch pot and the Tail/Handle, with somewhat stiffer slabs.
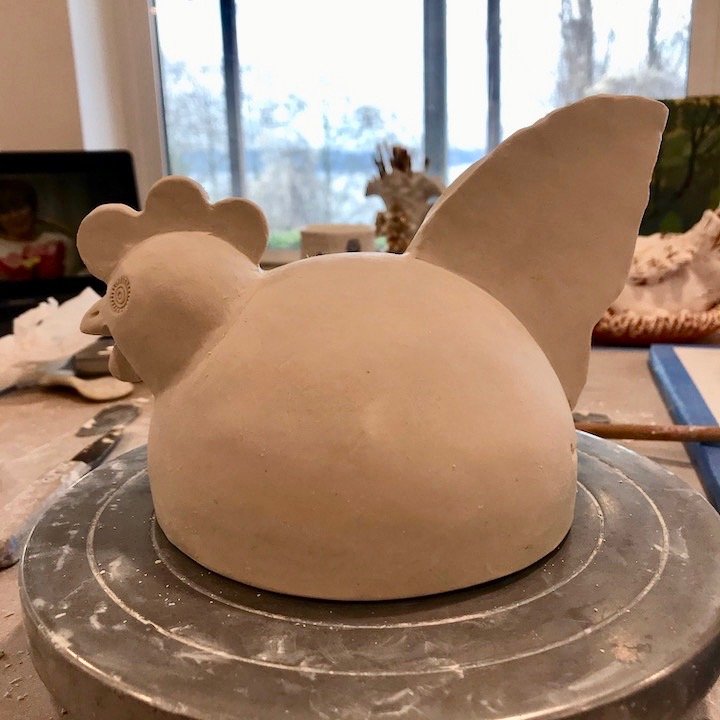
I push out the wing areas from the inside to made gentle bulges.

The tail has many slab strips added for grip and to bring the Chicken to Life
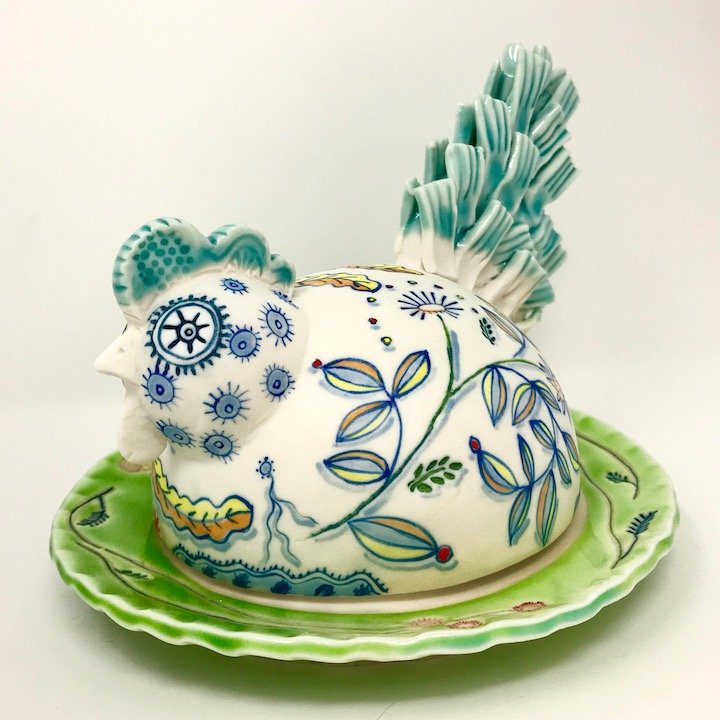
Hand painted and glazed Chicken Butterdish
The Clam Shell Technique.
After making a slab, I cut out two of the same shape flipping one over so that it reads like an open book. I give volume to the flat shapes using a firm rubber rib to push out the form onto soft cushion foam and then inside the palm of my hand. After letting the curved slab stiffen a little, I hold it in my hand and push it out again with a rubber rib to increase the volume and smooth the stretched surface. At this point, I let the two swelled sides dry a bit more so that they stiffen to a leather hard consistency. If I am planning to stamp the clay with decoration I do it now, before the clay gets too firm. Once the two opposing sides are dry enough to hold their shape, I score the rims of each half and brush white vinegar on the scored surface and then I score again, creating a muddy edge where the two rims will be joined. Slowly, I join the opposing edges, nudging them in or out, adding small pieces of clay to fill any gaps and using a metal rib and then a finely serrated rib to scrape the edge into a curved continuous form. The bases are pinch pots. I join the base to the owl in the same manner as I joined the two sides, scoring, wetting with vinegar, and scoring again.
I use this technique for many forms, including flasks, some vases, oil lamps, frog salt and pepper shakers, and more.


These are a similar technique.
Water-Etch Technique
One decorative surface I have been especially interested in of late is created using a Water-Etch Technique. Once the clay is a leather hard, I paint wax resist (that has been dyed using food coloring so I can see it) onto the surfaces I want to remain un-etched. On the teapot below I painted the wax resist onto the knob, wood-grain carved handle, the textured foot, and all of the stamped impressions.
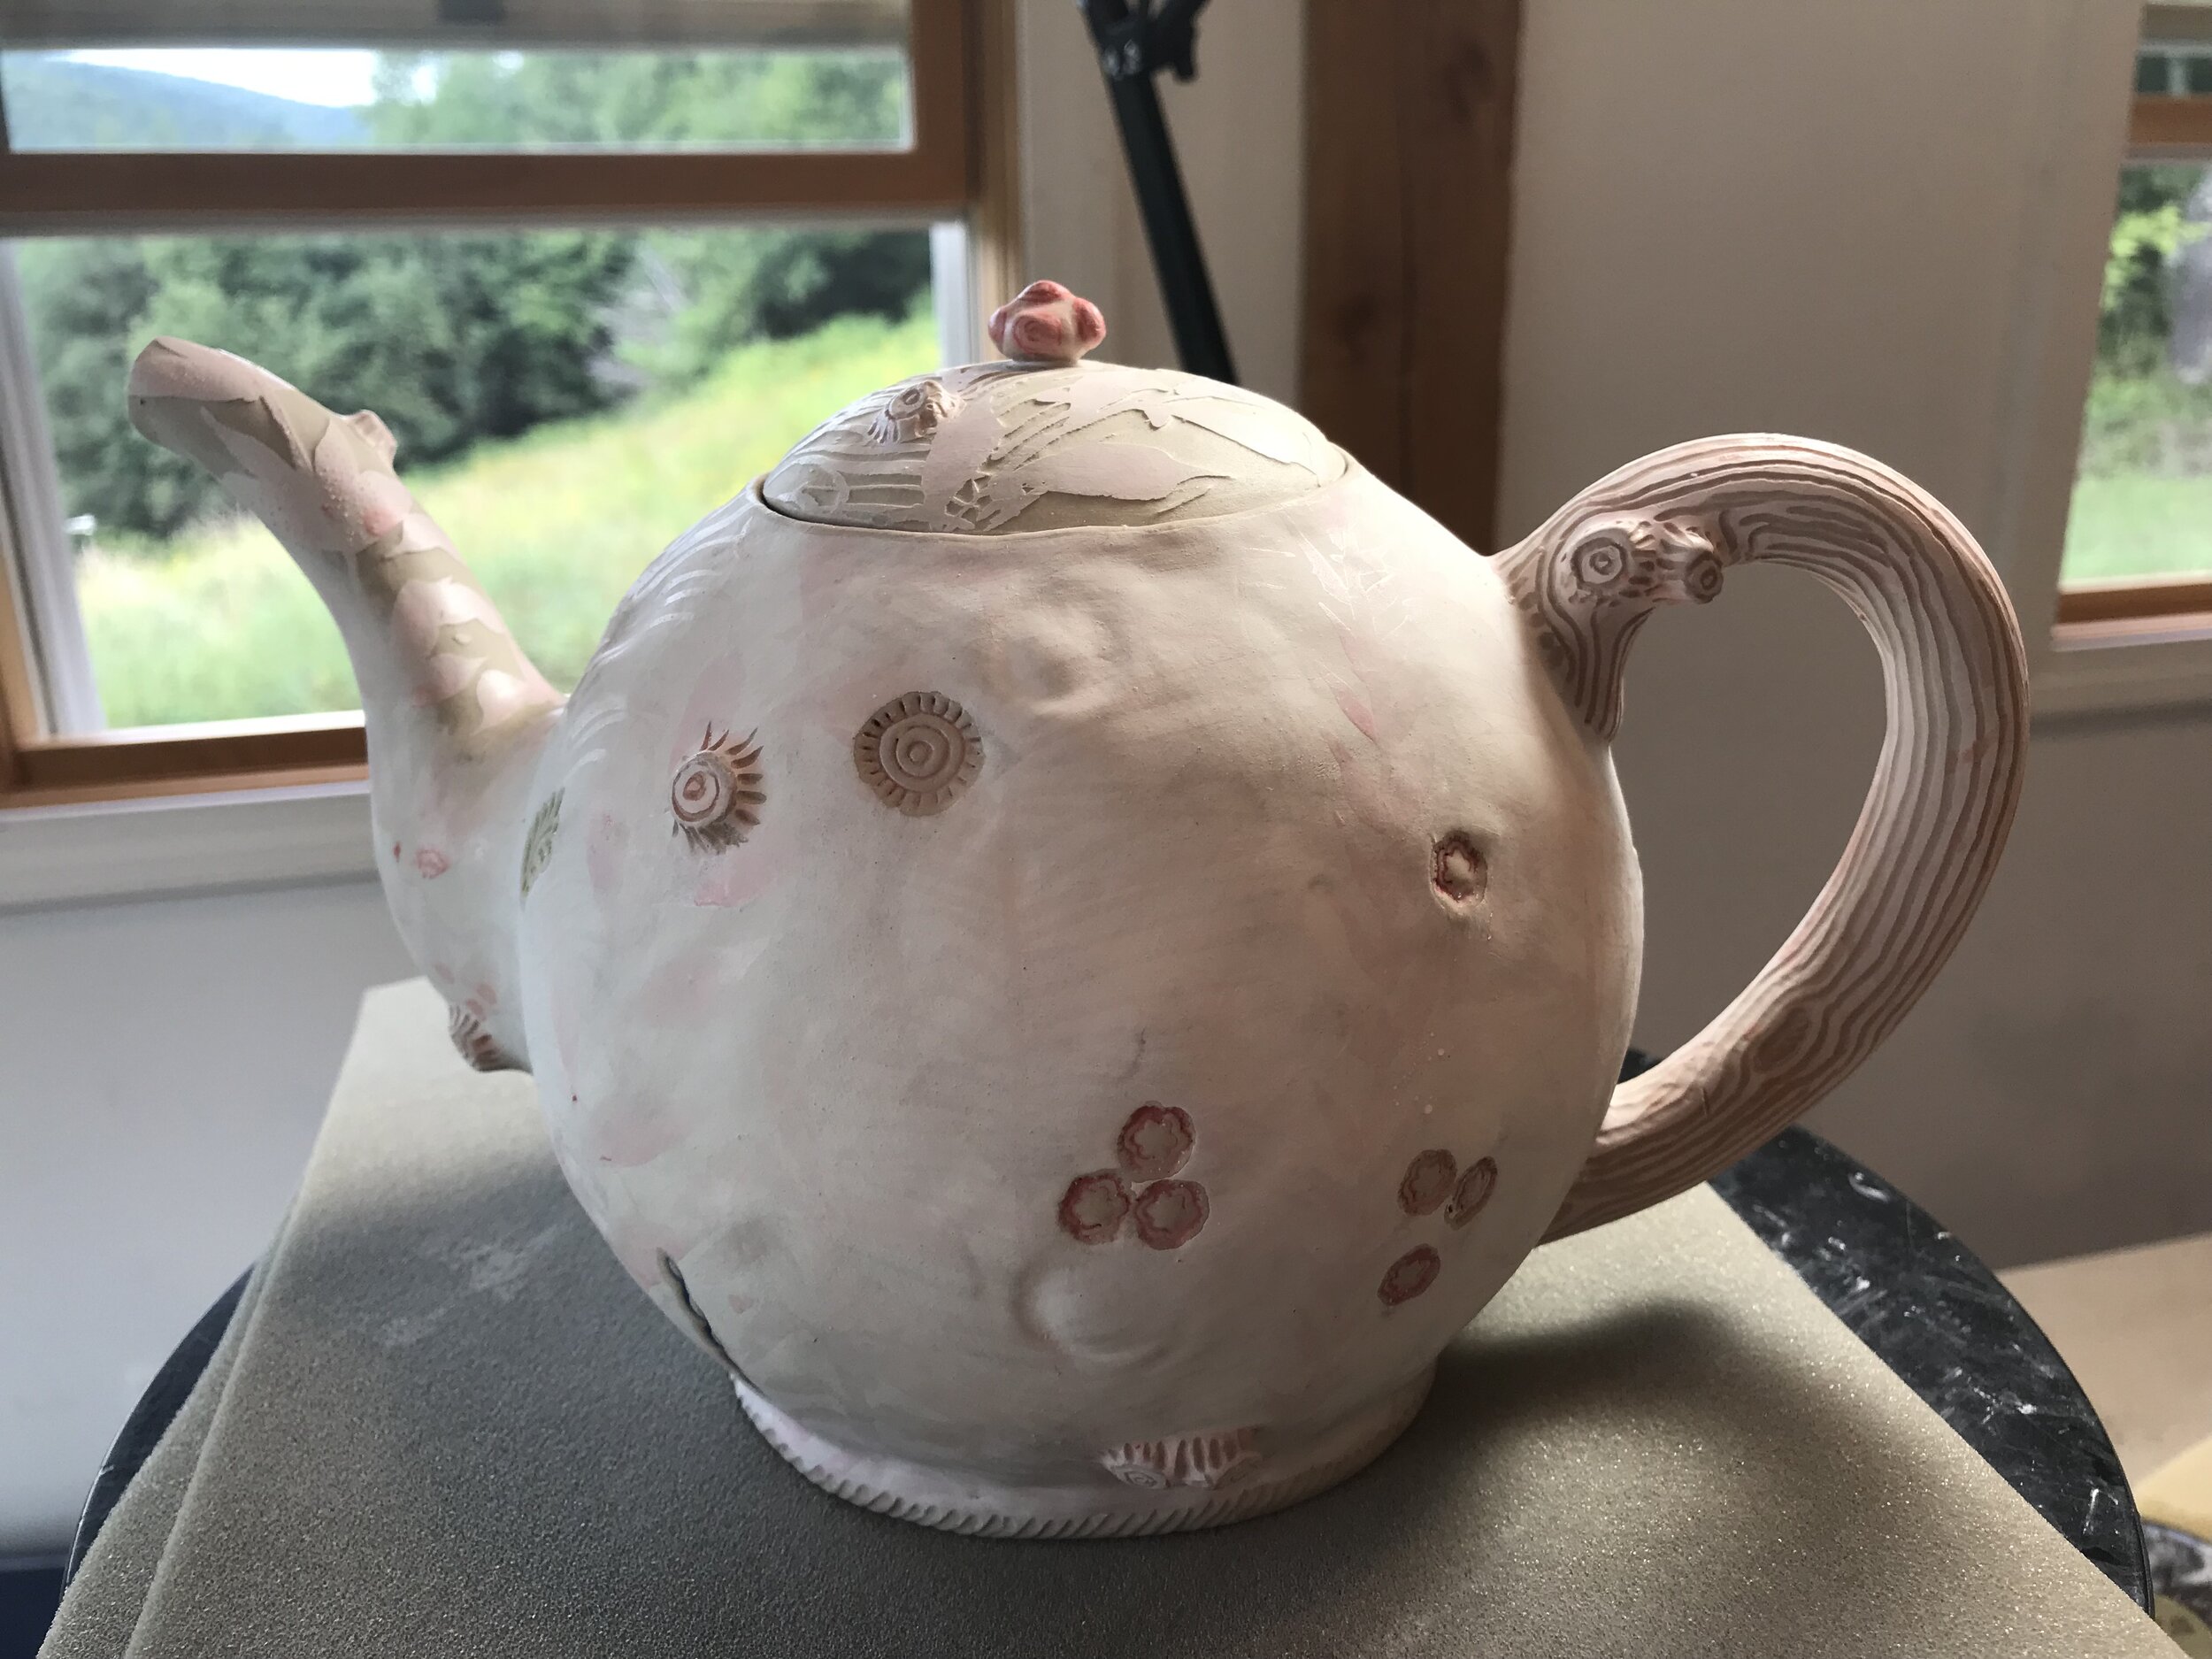


Next, I brush the surface using the food colored wax resist (pale pink) to decorate the surface of the piece. Once the wax resist has dried, I put the piece into the refrigerator (not the freezer!) in order to cool and harden the wax for at least 10 minutes, but could be a couple of hours. This step hardens the wax which makes the wax more effective at resisting and helps maintain the painted edge of the waxed decoration.
Using very cold water or even ice water and a sponge, I wipe the unwaxed clay away creating a relief textured surface.


When you look carefully at the surface of the vases below you can see that I have carved into the surface after water-etching.


Bottom Up Technique
These squirrel growlers are built from the bottom up, as much of my work is. As it is being built, the walls are pushed out from the interior to define the form. Carving activates the surface of the form.